Anonymous Access & Social Login
Applications such as online stores provide users the ability to view a list of available products, read their description, or compare with each other without logging in. But in order to make a purchase, users usually have to register, and using a social network account is the most convenient way to do it.
What we are going to build
This guide enhances the CUBA Petclinic example to demonstrate how to enable application public access and allow users to register via social services.
In particular, the following topics will be covered:
-
Anonymous access
-
Custom Login Dialog
-
OAuth Web Flow
-
Social Login
-
Auto-registration

Requirements
Your development environment requires to contain the following:
-
CUBA Studio as standalone IDE or as an IntelliJ IDEA plugin
Download and unzip the source repository for this guide, or clone it using git:
Example: CUBA petclinic
The project that is the basis for this example is CUBA Petclinic. It is based on the commonly known Spring Petclinic. The CUBA Petclinic application deals with the domain of a Pet clinic and the associated business workflows to manage a pet clinic.
The underlying domain model for the application looks like this:
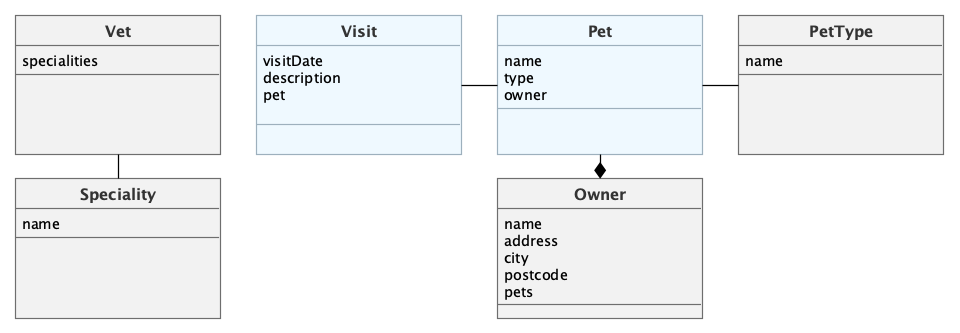
The main entities are Pet and Visit. A Pet is visiting the petclinic and during this Visit a Vet is taking care of it. A Pet belongs to an Owner, which can hold multiple pets. The visit describes the act of a pet visiting the clinic with the help of its owner.
Public Access
Oftentimes CRM-like applications have info or features that should be available for both authenticated and anonymous users - products, services, etc. This scenario is also relevant for dashboards, contacts or support pages. In this guide we will provide an ability to view the list of veterinarians working in the clinic and pets that can be brought for treatment without logging in to the application, i.e. working in app anonymously.
Since version 7.1 CUBA provides more flexible approach to create publicly available screens that can be easily managed with a built-in security subsystem. We will use it to provide access for Anonymous users.
Let’s begin.
Setting up Anonymous Access
The first thing that should be done is enabling anonymous access via application properties:
cuba.web.allowAnonymousAccess = trueWhen this setting is on and the current user session is not authenticated (i.e. not logged in), the application will check permissions of the anonymous user to this screen instead of redirecting to the login screen.
Initial Screen
The next step is to configure the screen that will be opened by default:
cuba.web.initialScreenId = mainAnd now we have the first result:
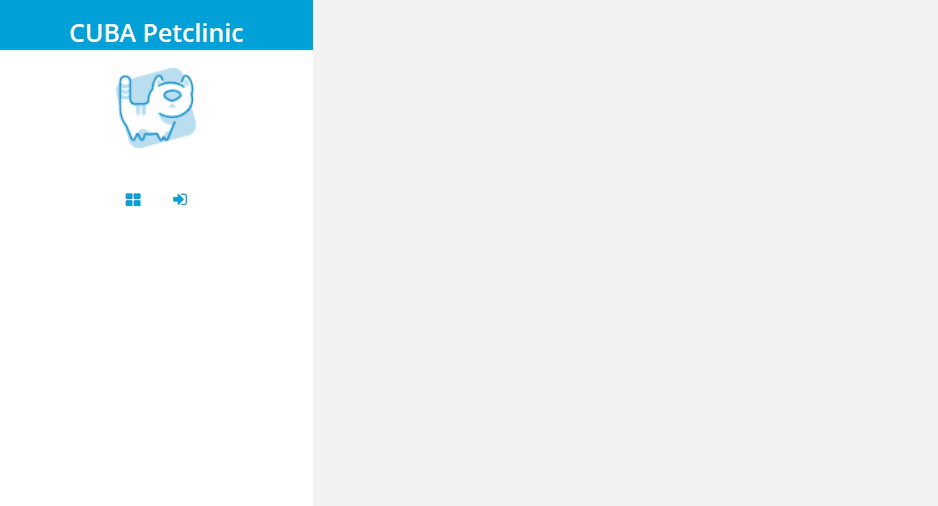
The main screen with an empty side menu is opened. But it’s not very interesting to see a blank page - let’s set up permissions for anonymous users.
Anonymous Permissions
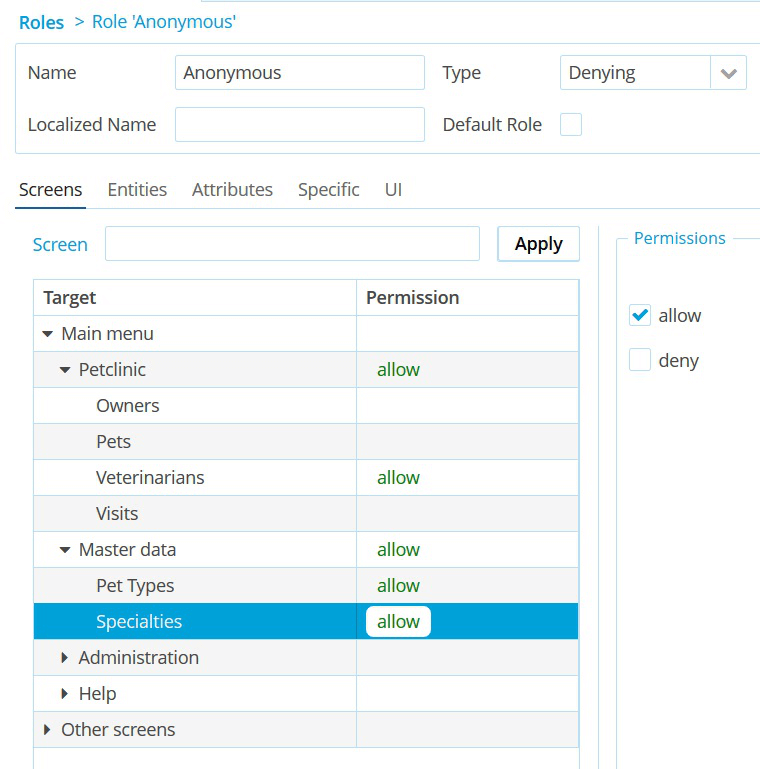
Click the Login button in the side menu to proceed to login screen and enter the system as an administrator. Open “Role” browser and edit “Anonymous” role.
Permit all required menu items and screens:
And give permissions to read corresponding entities:

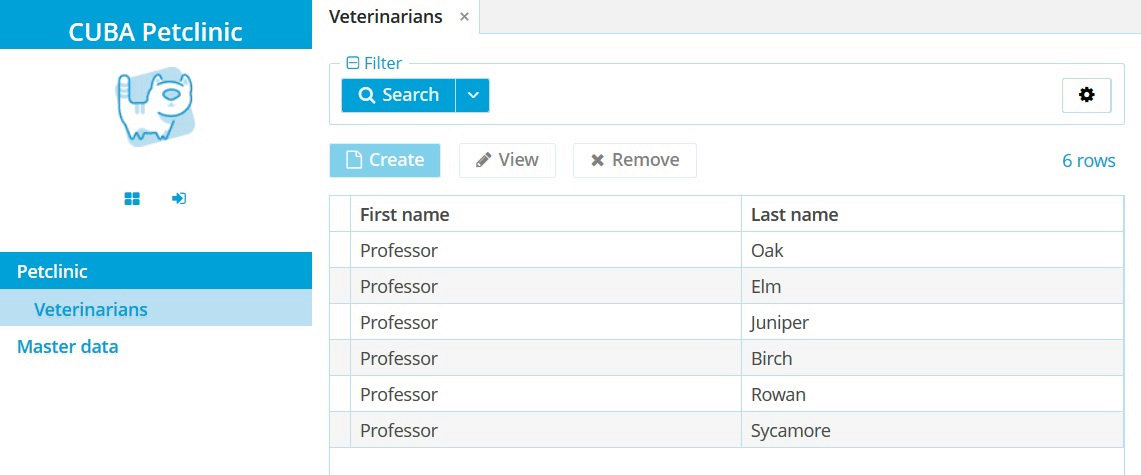
And restart the app. Now anonymous users can view the list of veterinarians:
Screen Routes
CUBA Navigation feature also supports anonymous access, so let’s register routes for our screens to be able to open screens directly. It can be done with @Route annotation:
@Route("vets")
@UiController("petclinic_Vet.browse")
@UiDescriptor("vet-browse.xml")
@LookupComponent("vetsTable")
@LoadDataBeforeShow
public class VetBrowse extends StandardLookup<Vet> {
}
Add routes for other screens in the same way:
-
@Route("pet-types")forPetTypeBrowse -
@Route("specs")forSpecialtyBrowse
Restart the app and try to open the Vets screen using the following link:
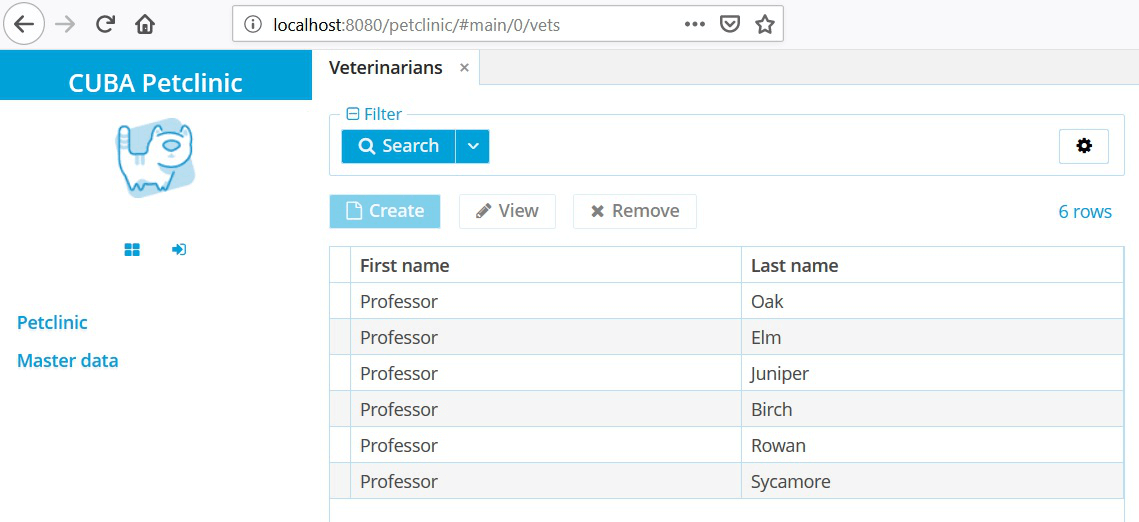
Now users can view the list of veterinarians, bookmark available pages or share links with friends without logging in to the application. Other public pages also can be navigated as usual, but if a user tries to open not permitted screens they will be redirected to the login screen.
Login Dialog
Default login process in CUBA application requires redirecting to a separate screen. In this section, we’ll demonstrate how to implement login using a modal dialog. Later we will place social networks buttons on this dialog.
Extended Main Screen
Let’s begin with extending the default Main Screen. Open “New Screen” dialog in CUBA Studio and choose a template named “Main screen with side menu”. You may notice that the screen layout has a new component - UserActionsButton. It combines “log in” action for anonymous users and allows logged in users to open the "Settings" screen or to log out.
The UserActionsButton component has a few extension points to override the default behavior for login and logout actions. It allows us to define our custom logic to open the dialog - add custom login handler via @Install annotation:
@UiController("main")
@UiDescriptor("ext-main-screen.xml")
public class ExtMainScreen extends MainScreen {

    @Install(to = "userActionsButton", subject = "loginHandler")
    private void loginHandler(UserActionsButton.LoginHandlerContext ctx) {
        // will open login dialog later
    }
}
Login Dialog
The new login dialog will be a simplified version of the default login screen, so start with creating a new blank screen. Make LoginDialog extend LoginScreen to re-use login process logic:
@UiDescriptor("login-dialog.xml")
@UiController("LoginDialog")
public class LoginDialog extends LoginScreen {
}
The dialog layout is just a login form copied from the default login screen:
<window xmlns="http://schemas.haulmont.com/cuba/screen/window.xsd"
        caption="mainMsg://loginWindow.loginField">

    <actions>
        <action id="submit"
                caption="mainMsg://loginWindow.okButton"
                icon="app/images/login-button.png"
                invoke="performLogin" shortcut="ENTER"/>
    </actions>

    <layout>
        <vbox id="loginMainBox"
              align="MIDDLE_CENTER"
              margin="true"
              width="320">
            <hbox id="loginTitleBox"
                  align="MIDDLE_CENTER"
                  spacing="true"
                  stylename="c-login-title">
                <image id="logoImage"
                       align="MIDDLE_LEFT"
                       height="AUTO"
                       scaleMode="SCALE_DOWN"
                       stylename="c-login-icon"
                       width="AUTO"/>

                <label id="welcomeLabel"
                       align="MIDDLE_LEFT"
                       stylename="c-login-caption"
                       value="mainMsg://loginDialog.label"/>
            </hbox>

            <capsLockIndicator id="capsLockIndicator"
                               align="MIDDLE_CENTER"
                               stylename="c-login-capslockindicator"/>
            <vbox id="loginForm"
                  spacing="true"
                  stylename="c-login-form">
                <cssLayout id="loginCredentials"
                           stylename="c-login-credentials">
                    <textField id="loginField"
                               htmlName="loginField"
                               inputPrompt="mainMsg://loginWindow.loginPlaceholder"
                               stylename="c-login-username"/>
                    <passwordField id="passwordField"
                                   autocomplete="true"
                                   htmlName="passwordField"
                                   inputPrompt="mainMsg://loginWindow.passwordPlaceholder"
                                   capsLockIndicator="capsLockIndicator"
                                   stylename="c-login-password"/>
                </cssLayout>
                <hbox id="rememberLocalesBox"
                      stylename="c-login-remember-locales">
                    <checkBox id="rememberMeCheckBox"
                              caption="mainMsg://loginWindow.rememberMe"
                              stylename="c-login-remember-me"/>
                    <lookupField id="localesSelect"
                                 nullOptionVisible="false"
                                 stylename="c-login-locale"
                                 textInputAllowed="false"/>
                </hbox>
                <button id="loginButton"
                        align="MIDDLE_CENTER"
                        action="submit"
                        stylename="c-login-submit-button"/>
            </vbox>
        </vbox>
    </layout>
</window>
Set the dialog width and add a login button click listener:
@Route
@DialogMode(width = "430")
@UiDescriptor("login-dialog.xml")
@UiController("LoginDialog")
public class LoginDialog extends LoginScreen {

    @Subscribe("submit")
    protected void onLoginButtonClick(ActionPerformedEvent event) {
        login();

        if (connection.isAuthenticated()) {
            close(WINDOW_CLOSE_ACTION);
        }
    }
}
The new login dialog should be available to all users regardless of their roles, so we’ll use the default permissions mechanism to enable it. Create default-permission-values.xml file in the root package of the core module with the following content:
<?xml version="1.0" encoding="UTF-8"?>
<default-permission-values xmlns="http://schemas.haulmont.com/cuba/default-permission-values.xsd">
    <!-- Permit to open LoginDialog for all roles by default -->
    <permission target="LoginDialog" value="1" type="10"/>
</default-permission-values>
And append this config to default permissions in app.properties file:
cuba.defaultPermissionValuesConfig = +com/haulmont/sample/petclinic/default-permission-values.xmlNow we can open our new dialog in UserActionsButton login handler:
@UiController("main")
@UiDescriptor("ext-main-screen.xml")
public class ExtMainScreen extends MainScreen {
@Inject
private Screens screens;
@Install(to = "userActionsButton", subject = "loginHandler")
private void loginHandler(UserActionsButton.LoginHandlerContext ctx) {
screens.create(LoginDialog.class, OpenMode.DIALOG)
.show();
}
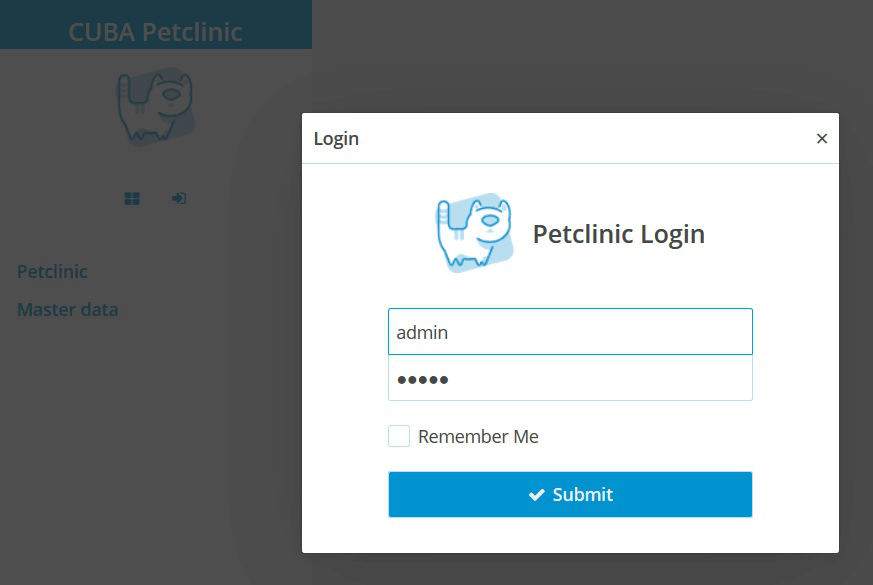
}Restart the app and try to log in:
Social Login
In most cases, applications and services require to register an account to use their features. Registration itself often involves filling out tedious forms and confirming an email address. One of the approaches that solves this problem and has become widespread is registration via social services like Google or Facebook.
The flow usually looks like this: the application redirects users to the social network login page, and after the users have allowed the requested access, they are redirected back to the application. Since application automatically registers a user account, it eliminates the need to fill in the fields and reduces the access time to the services it needs.
This approach is called "OAuth Web Flow" and we will use it to integrate the social login into Petclinic application.
OAuth Web Flow
One of the main tasks of the application is to automatically register a new account for user. It requires basic info like name, email, etc. Popular social network services like Facebook provide API endpoints to access this information. The common way to secure these endpoints is to use OAuth tokens, or “access tokens”.
First of all you should register your app in the social service:
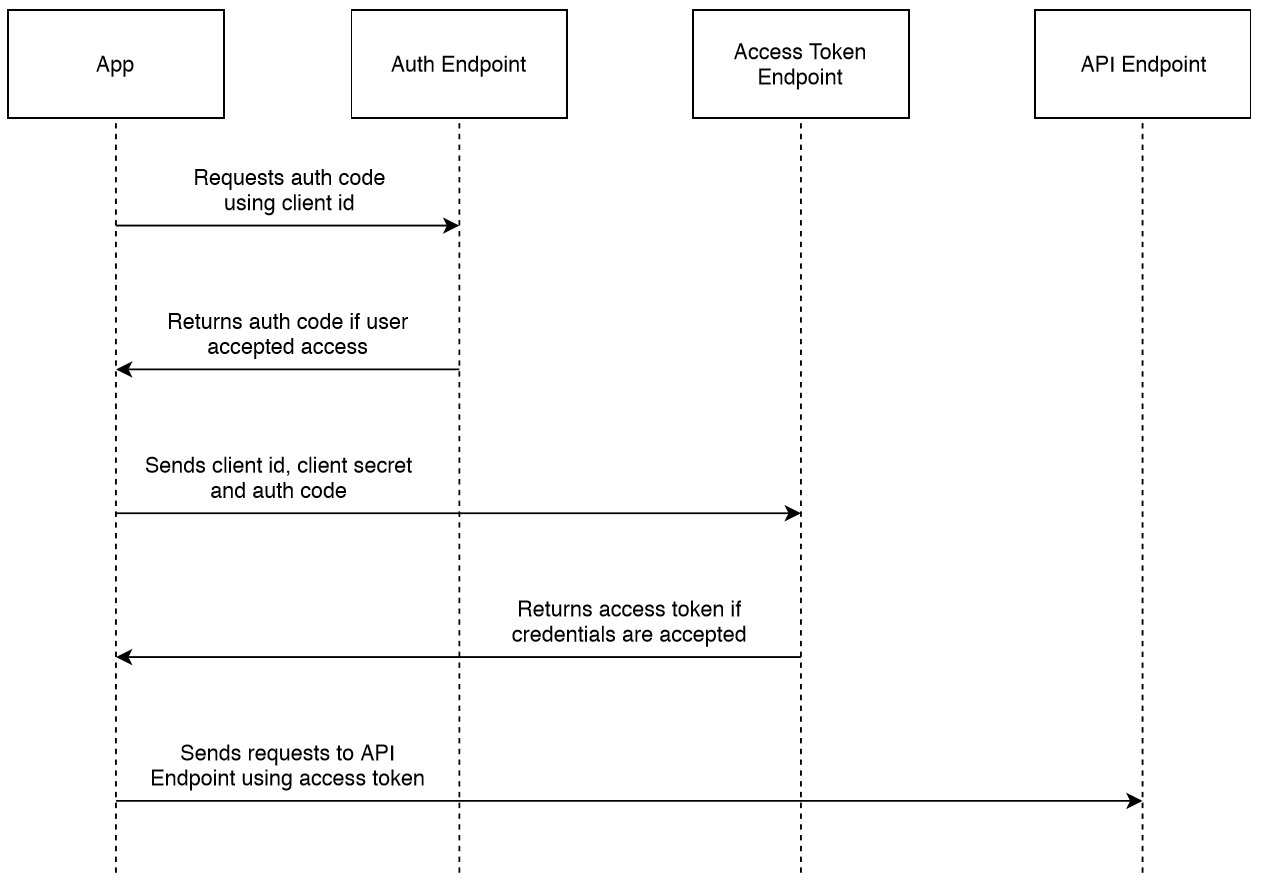
You’ll get a so-called client id and client secret credentials that are used in the authentication process:
-
The application sends a request with a client id to the auth service endpoint.
-
The service returns a response with a temporary code.
-
The application sends a request with a client id, client secret and the given code to the service.
-
The service returns a response with an access token if all credentials are correct.
Social Buttons
One of the most common ways to integrate social login in the UI is buttons in the registration dialog, for example, Pinterest:
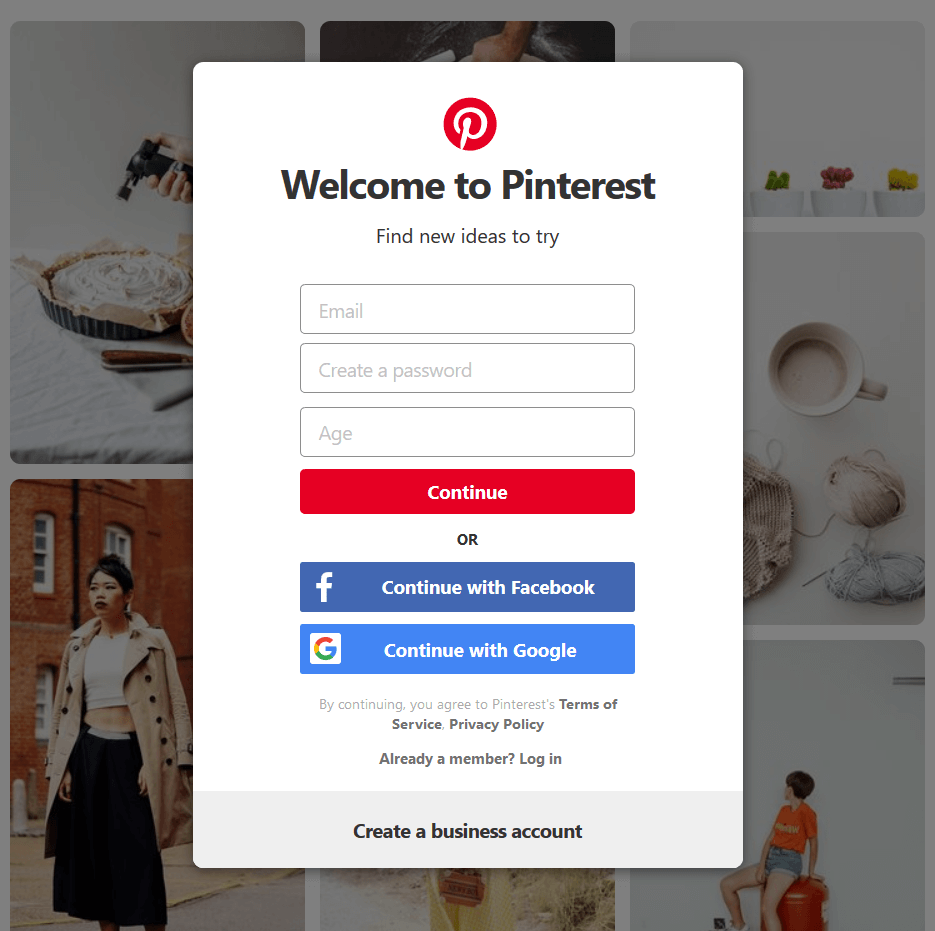
Add social buttons into the Login Dialog using LinkButton components placed into a horizontal box layout:
<hbox align="TOP_CENTER"
      margin="true;false;false;false"
      spacing="true"
      width="AUTO">
    <linkButton id="googleLogin"
                icon="GOOGLE"
                stylename="social-button"/>
    <linkButton id="facebookLogin"
                icon="FACEBOOK"
                stylename="social-button"/>
    <linkButton id="githubLogin"
                icon="GITHUB"
                stylename="social-button"/>
</hbox>
We’re using a custom style name to make buttons bigger. Open hover-ext.scss file and add the following rule:
.v-button-link.social-button {
  font-size: round($v-unit-size * 0.8);
}
Result:
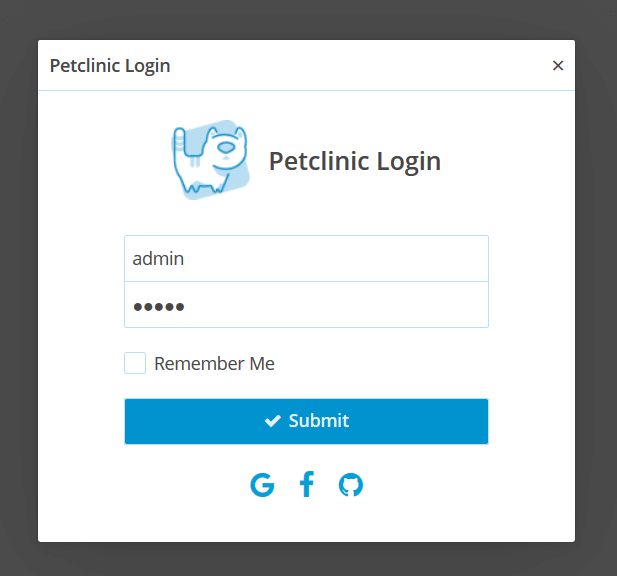
We’ll use these buttons later to trigger social login process.
Preliminary Preparation
Not all services support localhost as application host. You can add a host alias to the operating system hosts file and use it in the application properties:
cuba.webAppUrl = https://petclinic.com:8080/petclinicMoreover, the majority of social services require to use HTTPS - you can find a detailed guide on how to enable SSL for Tomcat container at https://tomcat.apache.org/tomcat-9.0-doc/ssl-howto.html.
Social Services Configuration
It’s assumed that the app is already registered in social services and the required credentials (client id and client secret) are available.
To store service credentials we’ll use the configuration interfaces mechanism. Let’s introduce the following configs:
-
GoogleConfig -
FacebookConfig -
GitHubConfig
Since a set of credentials is the same for all the services we can create a common interface SocialServiceConfig:
public interface SocialServiceConfig {

    String getClientId();

    String getClientSecret();
}
So, for example, GoogleConfig will be:
@Source(type = SourceType.APP)
public interface GoogleConfig extends Config, SocialServiceConfig {

    @Property("google.clientId")
    String getClientId();

    @Property("google.clientSecret")
    String getClientSecret();
}
After getting the client id and client secret from a social service, write them down to app.properties and restart the application:
google.clientId = <APP_CLIENT_ID>
google.clientSecret = <APP_CLIENT_SECRET>
Getting an Auth Code
The first step of authentication is to get an auth code - a temporary code that will be exchanged for an access token. To get a code we should redirect a user to the service authentication endpoint and handle a response.
Authentication process is almost the same for all social services, so we can write generic code. The main difference is connected with auth endpoint URLs, params, etc, so in the beginning, we introduce the following enum:
public enum SocialService {

    GOOGLE,
    FACEBOOK,
    GITHUB
}
Let’s create a service that will generate an address of authentication endpoint:
public interface SocialLoginService {

    String NAME = "petclinic_SocialLoginService";

    String getLoginUrl(SocialService socialService);
}
To form a login address we should combine the endpoint URL and the required parameters:
public class SocialLoginServiceBean implements SocialLoginService {

    @Override
    public String getLoginUrl(SocialService socialService) {
        String authEndpoint = SocialLoginHelper.getAuthEndpoint(socialService);
        String params = SocialLoginHelper.getAuthParams(
                socialService,
                getClientId(socialService),
                getRedirectUri());
        return authEndpoint + params;
    }

    private String getClientId(SocialService socialService) {
        return getSocialServiceConfig(socialService).getClientId();
    }

    private SocialServiceConfig getSocialServiceConfig(SocialService socialService) {
        switch (socialService) {
            case GOOGLE:
                return configuration.getConfig(GoogleConfig.class);
            case FACEBOOK:
                return configuration.getConfig(FacebookConfig.class);
            case GITHUB:
                return configuration.getConfig(GitHubConfig.class);
            default:
                throw new IllegalArgumentException(
                        "No config found for service: " + socialService);
            }
    }

    private String getRedirectUri() {
        return configuration.getConfig(GlobalConfig.class).getWebAppUrl();
    }
}
SocialLoginHelper is a utility class that contains auth URLs and generates parameters part:
public final class SocialLoginHelper {

    private static final String GOOGLE_AUTH_ENDPOINT =
            "https://accounts.google.com/o/oauth2/v2/auth?";
    private static final String FACEBOOK_AUTH_ENDPOINT =
            "https://www.facebook.com/v3.3/dialog/oauth?";
    private static final String GITHUB_AUTH_ENDPOINT =
            "https://github.com/login/oauth/authorize?";

    public static String getAuthEndpoint(SocialService socialService) {
        switch (socialService) {
            case GOOGLE:
                return GOOGLE_AUTH_ENDPOINT;
            case FACEBOOK:
                return FACEBOOK_AUTH_ENDPOINT;
            case GITHUB:
                return GITHUB_AUTH_ENDPOINT;
        }
        throw new IllegalArgumentException(
                "No auth endpoint found for service: " + socialService);
    }

    // ...
}
Add social button click listeners and redirect a user to a social service login page:
public class LoginDialog extends LoginScreen {

    @Subscribe("googleLogin")
    private void onGoogleLoginClick(Button.ClickEvent event) {
        performSocialLogin(SocialService.GOOGLE);
    }

    private void performSocialLogin(SocialService socialService) {
        String loginUrl = socialLoginService.getLoginUrl(socialService);

        Page.getCurrent()
                .setLocation(loginUrl);
    }
}
After logging in, the service will redirect us back and we should handle a response.
Handling Social Service Response
To handle a response with the temporary code we will use Vaadin Request Handlers mechanism - it allows us to add request callbacks using simple functional interface.
Our callback handler will use SocialLoginService to fetch user data, so it should be a bean. Request handlers should be added to the current session before the request and removed from it in the end. It means that we can implement the handler as a prototype bean:
@Scope(BeanDefinition.SCOPE_PROTOTYPE)
@Component(SocialServiceCallbackHandler.NAME)
public class SocialServiceCallbackHandler implements RequestHandler {

    public static final String NAME = "petclinic_SocialServiceCallbackHandler";

    private final SocialService service;
    private final URI redirectUri;

    public SocialServiceCallbackHandler(SocialService service) {
        this.service = service;
        redirectUri = Page.getCurrent().getLocation();
    }

    @Override
    public boolean handleRequest(VaadinSession session,
                                 VaadinRequest request,
                                 VaadinResponse response) throws IOException {
        return true; // to be implemented
    }
}
Let’s highlight the main responsibilities of the handler:
-
Extract auth code from response and fetch user data via
SocialLoginService -
Create
Credentialsinstance based on user data -
Trigger login process and redirect user back to the app
First, we use the UIAccessor instance to lock the UI until the login request is processed:
public class SocialServiceCallbackHandler implements RequestHandler, InitializingBean {

    @Override
    public boolean handleRequest(VaadinSession session, VaadinRequest request,
                                 VaadinResponse response) throws IOException {
        if (request.getParameter("code") == null) {
            return false;
        }

        uiAccessor.accessSynchronously(() -> {
            try {
                Credentials credentials = getCredentials(request.getParameter("code"),
                        service);
                app.getConnection().login(credentials);
            } catch (Exception e) {
                log.error("Unable to login using service: " + service, e);
            } finally {
                session.removeRequestHandler(this);
            }
        });

        ((VaadinServletResponse) response).getHttpServletResponse().
                sendRedirect(ControllerUtils.getLocationWithoutParams(redirectUri));

        return true;
    }

    @Override
    public void afterPropertiesSet() {
        uiAccessor = backgroundWorker.getUIAccessor();
    }

    private Credentials getCredentials(String authCode, SocialService socialService) {
        return null; // to be implemented
    }
}
Get back to LoginDialog and use the callback handler:
public class LoginDialog extends LoginScreen {

    private void performSocialLogin(SocialService socialService) {
        String loginUrl = socialLoginService.getLoginUrl(socialService);

        VaadinSession.getCurrent()
                .addRequestHandler(getCallbackHandler(socialService));

        close(WINDOW_CLOSE_ACTION);

        Page.getCurrent()
                .setLocation(loginUrl);
    }

    private RequestHandler getCallbackHandler(SocialService socialService) {
        return getBeanLocator()
                .getPrototype(SocialServiceCallbackHandler.NAME, socialService);
    }
}
Exchanging an Auth Code for Access Token
When the auth code is available, we can use it to get an access token. Form a request with the required params depending on the social network service:
public class SocialLoginServiceBean implements SocialLoginService {

    private HttpRequestBase getAccessTokenRequest(SocialService socialService,
            String authCode) {
        switch (socialService) {
            case GOOGLE: {
                HttpPost tokenRequest = new HttpPost(
                        getAccessTokenPath(socialService, authCode));
                tokenRequest.setEntity(getGoogleAccessTokenParams(authCode));
                return tokenRequest;
            }
            case FACEBOOK:
            case GITHUB: {
                HttpGet tokenRequest = new HttpGet(
                        getAccessTokenPath(socialService, authCode));
                tokenRequest.setHeader(HttpHeaders.ACCEPT,
                MediaType.APPLICATION_JSON_VALUE);
                return tokenRequest;
            }
            default:
                throw new IllegalArgumentException(
                        "Unable to create request for social service: " + socialService);
        }
    }

    private String getAccessTokenPath(SocialService socialService, String authCode) {
        String clientId = getClientId(socialService);
        String clientSecret = getClientSecret(socialService);
        String redirectUri = getRedirectUri();
        return SocialLoginHelper.getAccessTokenPath(socialService, clientId,
                clientSecret, redirectUri, authCode);
    }

    private UrlEncodedFormEntity getGoogleAccessTokenParams(String authCode) {
        Map<String, String> params = SocialLoginHelper.getGoogleAccessTokenParams(
                getClientId(SocialService.GOOGLE),
                getClientSecret(SocialService.GOOGLE),
                getRedirectUri(),
                authCode);

        List<BasicNameValuePair> requestParams = params.entrySet().stream()
                .map(entry -> new BasicNameValuePair(entry.getKey(), entry.getValue()))
                .collect(Collectors.toList());

        return new UrlEncodedFormEntity(requestParams, StandardCharsets.UTF_8);
    }

    private String getClientSecret(SocialService socialService) {
        return getSocialServiceConfig(socialService).getClientSecret();
    }

    // ...
}
Then use Apache HttpClient library to perform request:
public class SocialLoginServiceBean implements SocialLoginService {

    private String requestAccessToken(HttpRequestBase accessTokenRequest) {
        HttpClientConnectionManager cm = new BasicHttpClientConnectionManager();
        HttpClient httpClient = HttpClientBuilder.create().setConnectionManager(cm)
                .build();

        try {
            HttpResponse httpResponse = httpClient.execute(accessTokenRequest);
            if (httpResponse.getStatusLine().getStatusCode() != 200) {
                throw new RuntimeException(
                        "Unable to get access token. Response HTTP status: " +
                        httpResponse.getStatusLine().getStatusCode());
            }
            return EntityUtils.toString(httpResponse.getEntity());
            } catch (IOException e) {
                throw new RuntimeException(e.getMessage());
            } finally {
                accessTokenRequest.releaseConnection();
            }
    }

    // ...
}
And parse access token using Google Gson:
public class SocialLoginServiceBean implements SocialLoginService {

    private String extractAccessToken(String response) {
        JsonParser parser = new JsonParser();
        JsonObject asJsonObject = parser.parse(response)
                .getAsJsonObject();

        return asJsonObject.get("access_token").getAsString();
    }

    // ...
}
All in one:
public class SocialLoginServiceBean implements SocialLoginService {

    private String getAccessToken(SocialService socialService, String authCode) {
        HttpRequestBase accessTokenRequest = getAccessTokenRequest(socialService,
                authCode);
        String response = requestAccessToken(accessTokenRequest);
        return extractAccessToken(response);
    }

    // ...
}
Auto-Registration
The final part of the guide describes how to use the access token to get profile info, register a new account and login the user.
Fetching User Data
Oftentimes social network service API endpoints enable you to specify a set of fields to fetch. Let’s add one more setting to our config interfaces:
public interface SocialServiceConfig {

    String getUserDataFields();

    // ...
}
For example, GoogleConfig:
@Source(type = SourceType.APP)
public interface GoogleConfig extends Config, SocialServiceConfig {

    @Property("google.clientId")
    String getClientId();

    @Property("google.clientSecret")
    String getClientSecret();

    @Default("id,name,email")
    @Property("google.userDataFields")
    String getUserDataFields();
}
Create a simple immutable POJO to store the loaded profile info:
class SocialUserData implements Serializable {

    private String id;
    private String login;
    private String name;

    public SocialUserData(String id, String login, String name) {
        this.id = id;
        this.login = login;
        this.name = name;
    }

    public String getId() {
        return id;
    }

    public String getLogin() {
        return login;
    }

    public String getName() {
        return name;
    }

    @Override
    public String toString() {
        return "SocialUserData{" +
                "id='" + id + '\'' +
                ", login='" + login + '\'' +
                ", name='" + name + '\'' +
                '}';
    }
}
Let’s add a new SocialLoginService method that will accept the auth code and return corresponding user data.
public interface SocialLoginService {

    SocialUserData getUserData(SocialService socialService, String authCode);

    // ...
}
The method will do the following:
-
Fetch an access token using the auth code
-
Fetch user data using access token
-
Parse a response to create
SocialUserDatainstance
Since exchanging the auth code for the access token is already described, we can proceed to fetching user data:
public class SocialLoginServiceBean implements SocialLoginService {

    private String getUserDataAsJson(SocialService socialService, String accessToken) {
        String userDataEndpoint = SocialLoginHelper.getUserDataEndpoint(socialService);
        String params = SocialLoginHelper.getUserDataEndpointParams(
                socialService,
                accessToken,
                getUserDataFields(socialService));
        String url = userDataEndpoint + params;

        return performRequest(new HttpGet(url));;
    }

    private String performRequest(HttpRequestBase request) {
        HttpClientConnectionManager cm = new BasicHttpClientConnectionManager();
        HttpClient httpClient = HttpClientBuilder.create()
                .setConnectionManager(cm)
                .build();
        try {
            HttpResponse httpResponse = httpClient.execute(request);
            if (httpResponse.getStatusLine().getStatusCode() != 200) {
                throw new RuntimeException("Unable to perform request. Response HTTP status: "
                        + httpResponse.getStatusLine().getStatusCode());
            }
            return EntityUtils.toString(httpResponse.getEntity());
        } catch (IOException e) {
            throw new RuntimeException(e.getMessage());
        } finally {
            request.releaseConnection();
        }
    }

    // ...
}
Parse user data from the response into SocialUserData POJO:
public class SocialLoginServiceBean implements SocialLoginService {

    @Override
    public SocialUserData getUserData(SocialService socialService, String authCode) {
        String accessToken = getAccessToken(socialService, authCode);
        String userDataJson = getUserDataAsJson(socialService, accessToken);
        return parseUserData(userDataJson);
    }

    private SocialUserData parseUserData(String userDataJson) {
        JsonParser parser = new JsonParser();

        JsonObject response = parser.parse(userDataJson)
                .getAsJsonObject();

        String id = Strings.nullToEmpty(response.get("id").getAsString());
        String name = Strings.nullToEmpty(response.get("name").getAsString());

        String login = Strings.nullToEmpty(response.get("email").getAsString());
        if (StringUtils.isEmpty(login)) {
            login = Strings.nullToEmpty(response.get("login").getAsString());
        }

        return new SocialUserData(id, login, name);
    }

    // ...
}
Social Credentials
Now we can log in user via CUBA Security Subsystem. The general workflow is the following:
-
Credentialsinstance is passed intoConnection -
Connectioniterates over availableLoginProvidersand checks whether it supports the passed credentials -
When suitable provider is found
Connectiondelegates invocation to it
To support custom login you should create your own Credentials and LoginProvider
that supports such type of credentials.
Create a new class SocialCredentials in the web module:
public class SocialCredentials extends AbstractClientCredentials {

    private final SocialUserData userData;
    private final SocialService socialService;

    public SocialCredentials(SocialUserData userData,
                             SocialService socialService,
                             Locale locale) {
        super(locale, Collections.emptyMap());
        this.userData = userData;
        this.socialService = socialService;
    }

    @Override
    public String getUserIdentifier() {
        return userData.getId();
    }

    // ...
}
Let’s go back to SocialServiceCallbackHandler to finish its implementation:
public class SocialServiceCallbackHandler implements RequestHandler, InitializingBean {

    private Credentials getCredentials(String authCode, SocialService socialService) {
        SocialLoginService.SocialUserData userData = socialLoginService
                .getUserData(socialService, authCode);

        Locale defaultLocale = messages.getTools()
                .getDefaultLocale();

         return new SocialCredentials(userData, socialService, defaultLocale);
    }

    // ...
}
Login Provider
The Connection component uses all available LoginProviders to get new authentication info. LoginProviders mechanism enables you to use ordered Spring beans to authenticate a user for different types of credentials. We will use this extension point to create a social login provider:
@Component(SocialLoginProvider.NAME)
public class SocialLoginProvider implements LoginProvider {

    public static final String NAME = "petclinic_SocialLoginProvider";

    @Nullable
    @Override
    public AuthenticationDetails login(Credentials credentials) throws LoginException {
        SocialCredentials socialCredentials = (SocialCredentials) credentials;
        SocialLoginService.SocialUserData userData = socialCredentials.getUserData();

        // to be implemented

        return null;
    }

    @Override
    public boolean supports(Class<?> credentialsClass) {
        return SocialCredentials.class.isAssignableFrom(credentialsClass);
    }
}
We will extend the built-in ExternalUserLoginProvider to re-use its logic. Create a new ExternalUserCredentials based on the available info and pass it to the super method:
@Component(SocialLoginProvider.NAME)
public class SocialLoginProvider extends ExternalUserLoginProvider implements LoginProvider {

    public static final String NAME = "petclinic_SocialLoginProvider";

    @Inject
    private SocialRegistrationService socialRegistrationService;

    @Nullable
    @Override
    public AuthenticationDetails login(Credentials credentials) throws LoginException {
        SocialCredentials socialCredentials = (SocialCredentials) credentials;

        SocialLoginService.SocialUserData userData = socialCredentials.getUserData();

        // to be implemented;
        User user = null;

        Locale defaultLocale = socialCredentials.getLocale();

        return super.login(new ExternalUserCredentials(user.getLogin(), defaultLocale));
    }

    // ...
}
To form credentials we have to find an existing or register a new user.
User Registration
Create a new entity SocialUser extending User and add three fields to it:
-
googleId -
facebookId -
githubId
These fields are required to bind the social network profile with the system user to be able to find it later. We should also assign a default group to a new user - create a new configuration interface:
@Source(type = SourceType.APP)
public interface SocialRegistrationConfig extends Config {

    @Default("0fa2b1a5-1d68-4d69-9fbd-dff348347f93")
    @Property("social.defaultGroupId")
    @Factory(factory = UuidTypeFactory.class)
    UUID getDefaultGroupId();
}
Create a new service SocialRegistrationService intended to find existing or register a new user:
public interface SocialRegistrationService {

    String NAME = "petclinic_SocialRegistrationService";

    User findOrRegisterUser(String socialServiceId, String login, String name,
                            SocialService socialService);

    // ...
}
Its implementation is quite straightforward:
public class SocialRegistrationServiceBean implements SocialRegistrationService {

    private static final Pattern EMAIL_PATTERN = Pattern.compile("[^@]+@[^.]+\\..+");

    @Inject
    private DataManager dataManager;
    @Inject
    private Configuration configuration;

    @Override
    public User findOrRegisterUser(String socialServiceId, String login, String name,
                                   SocialService socialService) {
        User existingUser = findExistingUser(socialService, socialServiceId);
        if (existingUser != null) {
            return existingUser;
        }

        SocialUser user = createNewUser(socialServiceId, login, name, socialService);

        return dataManager.commit(user);
    }

    @Nullable
    private User findExistingUser(SocialService socialService, String socialServiceId) {
        String socialServiceField = getSocialIdParamName(socialService);

        return dataManager.load(User.class)
                .query("select u from sec$User u where " +
                        String.format("u.%s = :socialServiceId", socialServiceField))
                .parameter("socialServiceId", socialServiceId)
                .one();
    }

    private SocialUser createNewUser(String socialServiceId, String login,
                                     String name, SocialService socialService) {
        SocialUser user = dataManager.create(SocialUser.class);

        user.setLogin(login);
        user.setName(name);
        user.setGroup(getDefaultGroup());
        user.setActive(true);

        if (isEmail(login)) {
            user.setEmail(login);
        }

        switch (socialService) {
            case GOOGLE:
                user.setGoogleId(socialServiceId);
                break;
            case FACEBOOK:
                user.setFacebookId(socialServiceId);
                break;
            case GITHUB:
                user.setGithubId(socialServiceId);
                break;
        }

        return user;
    }

    private Group getDefaultGroup() {
        SocialRegistrationConfig config = configuration.getConfig(SocialRegistrationConfig.class);

        return dataManager.load(Group.class)
                .query("select g from sec$Group g where g.id = :defaultGroupId")
                .parameter("defaultGroupId", config.getDefaultGroupId())
                .one();
    }

    private String getSocialIdParamName(SocialService socialService) {
        switch (socialService) {
            case GOOGLE:
                return "googleId";
            case FACEBOOK:
                return "facebookId";
            case GITHUB:
                return "githubId";
        }
        throw new IllegalArgumentException(
                "No social id param found for service: " + socialService);
    }

    private boolean isEmail(String s) {
        return EMAIL_PATTERN.matcher(s).matches();
    }
}
Get back to SocialLoginProvider and use SocialRegistrationService to get the user:
@Component(SocialLoginProvider.NAME)
public class SocialLoginProvider extends ExternalUserLoginProvider implements LoginProvider {

    @Nullable
    @Override
    public AuthenticationDetails login(Credentials credentials) throws LoginException {
        SocialCredentials socialCredentials = (SocialCredentials) credentials;

        SocialLoginService.SocialUserData userData = socialCredentials.getUserData();

        User user = socialRegistrationService.findOrRegisterUser(
                userData.getId(),
                userData.getLogin(),
                userData.getName(),
                socialCredentials.getSocialService());

        Locale defaultLocale = socialCredentials.getLocale();

        return super.login(new ExternalUserCredentials(user.getLogin(), defaultLocale));
    }

    // ...
}
Summary
Anonymous access allows you to provide some publicly available functionality in your application, like dashboards, news, or feedback page. But in case when some features are available only for logged in users, social login is a convenient way to avoid filling a registration form. In this guide we’ve described how to support these use cases for CUBA based applications.