

“Big Bang”
Rollout a complete replacement system in one go.


Generating reports is so common in business domains that it's unusual for such a feature to be missing in project. For example,

In the Java world, there's a good variety of options available to assist in implementing these features. Those are widely used libraries, such as Jasper Reports, which focuses on comprehensive reporting functionalities. Alternatively, there are smaller libraries that specialize in specific tasks, such as converting files to a specific format. Each of these tools contributes to the diverse toolkit available for Java developers.
In this article, we'll closely examine the Jasper Reports library to grasp its functionalities and explore how Jmix approaches a similar task. We explain what Jmix and Jmix add-ons are and share insights into how they operate under the hood.
In a simple example we add a feature to HR Onboarding application, we go through 5 high-level steps to dynamically generate documents, export them as PDFs, and showcase the results on the Jmix web application screen. We won't go into intricate step-by-step instructions, but instead, offer a high-level overview of the developer experience. If you're eager for more specifics, you can either clone the GitHub project or watch a webinar for in-depth insights.
When tasked with implementing a reporting feature, you may explore available options, and if you lean towards open-source software, you'll likely come across tools such as BIRT, Pentaho, and JasperReports. Each library is designed for seamless integration into Java projects. Our focus is on JasperReports Community due to its widespread usage and recognition.
JasperReports is a content-rendering library that allows developers to create, design, and generate reports. Jasper uses XML-based “server-side” templates, that get filled with data from different sources resulting in a final visual report.

Jasper reports renders the data provided as input, formats it according to template and returns the result to display on the screen, send it to printer or export in one of the office formats.
Developers often use the Report Designer - standalone visual design tool. It helps to create templates for the reports, determining the appearance of the final document. The Designer has a wide variety of feature inclining direct the connectivity to data sources. The designer returns .jxml file that than is consumed by Jasper reports engine. The engine takes this template and compiles it into an executable format. This compilation step optimizes the report for efficient processing. Using the compiled template and the provided data, the engine fills in the content of the report dynamically. Finally, it exports generated reports into multiple formats such as PDF, HTML, Excel.

Even though all its reporting functionality is available in this single JAR file, JasperReports relies on other third-party libraries for functionality like XML parsing, logging, and PDF and XLS generation.
On the top of the reporting Java API of the Jasper Reports Library there is HTTP based service which exposes its report generating functionality through a REST API.

JasperReports and other reporting libraries share a common purpose: they're designed to address a specific task. They take a template and a data, and then provide the filled-in template either for on-screen viewing or exportation into the office file format. Commercial features are continually evolving, progressing towards full-featured Business Intelligence (BI) suites. Unlike a regular reporting library, the Jmix Reports add-on goes a step further. It not only handles the main functions but also takes care of other important tasks like managing data, ensuring security, connecting with the user interface, and providing visual screens for configuring reports. Many of that features are available in Runtime.
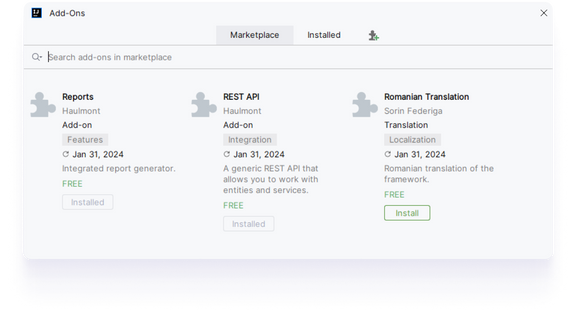
Jmix Framework provides a foundation for Java web application. Jmix Reports Add-on is a ready to use functional module, that implements a particular business feature and seamlessly integrates into Jmix Java web application.
Jmix is an open-source high-productivity development platform for backend Java developers, based on Spring Boot. Jmix consists of 3 major parts that work together.

Basically, Jmix add-on is a Java library. If we compare it to a standard Java library, like Jasper Reports, the distinction lies in the fact that the Jmix add-on adheres to specific rules and utilizes certain Jmix core features to seamlessly integrate the provided functionality into the host application. The most important thing is that an add-on is full stack: it can contain entities, database schema and UI screens that seamlessly integrate into the data model and UI of the application. So just by adding an add-on as a dependency to build.gradle, you can get a whole new subsystem in your project, with data stored in your database and UI integrated with the main menu.

Reports add-on consists of several components. Each component adds specific functionality:


In this case study, we take a look at a Jmix web application created to help new employees start their roles and go through onboarding steps. The app keeps track of each user's onboarding tasks, but there's a crucial process missing.
When a new employee joins the company, they are required to complete a number of legal and internal documents and forms before starting their role.
These include standard legal forms, like the Employee Verification Form and Non-Disclosure Agreement Form, which need to be filled with user data from the application database and then downloaded in PDF or DOC formats.
We won't go into step-by-step instructions, but instead, a high-level overview of the developer experience. If you're eager for more specifics, you can either clone the GitHub project or watch a webinar for in-depth insights.
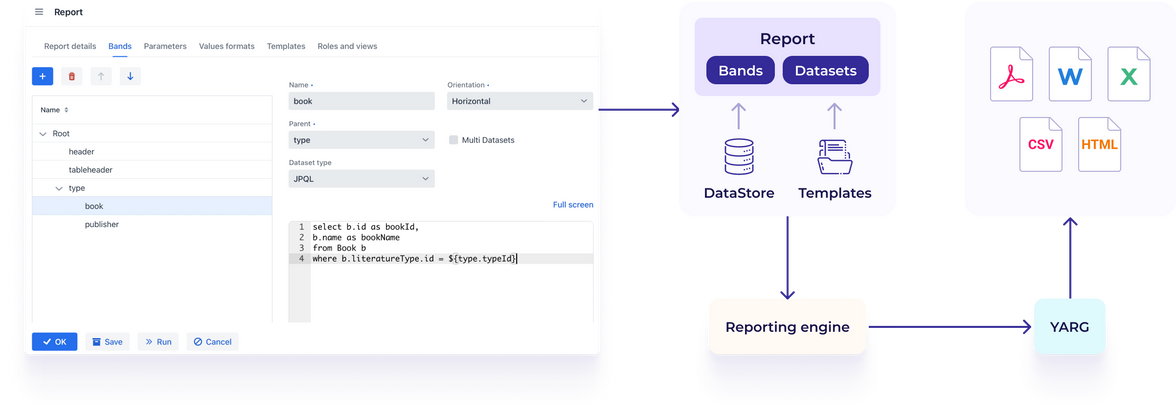
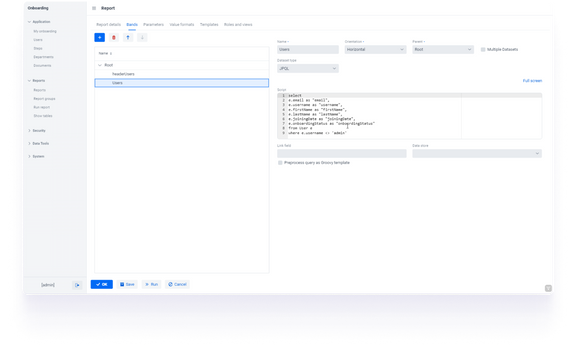
To create a report, specify details such as name, description, or group for the report, and indicate whether it should be exposed via REST API.
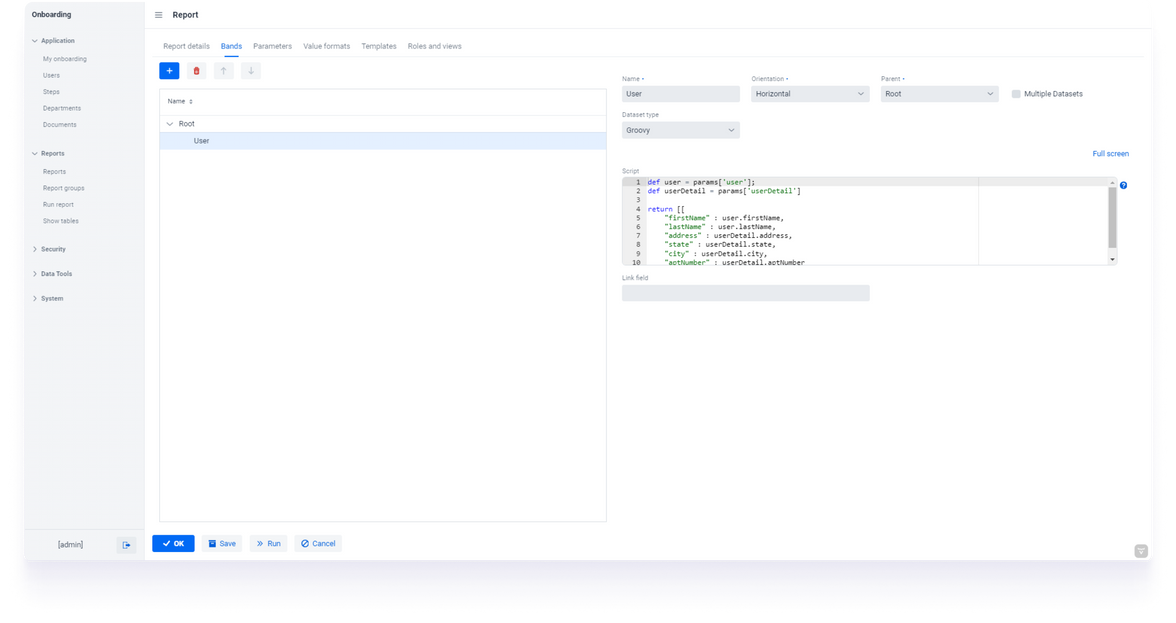
Next, create bands, named regions in the template, which will be filled with data specified on the same screen using SQL, JPQL, or Groovy.
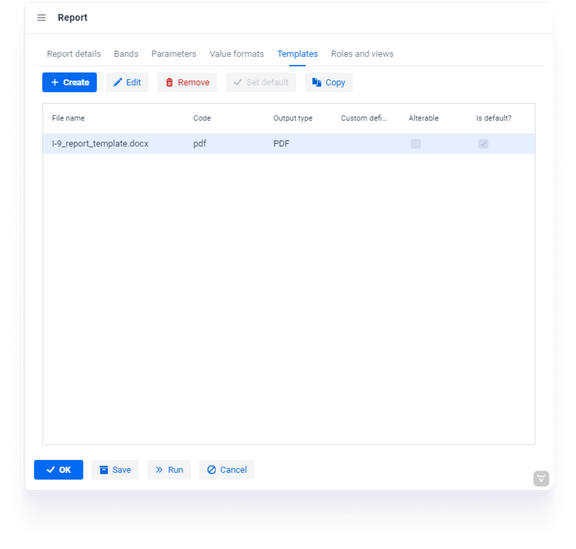
Once bands, parameters, and value formats are set, upload a template to be filled with the data. You can use Word, Excel, HTML, or other formats for the template. In this example, we'll use a .docx file with the Employee Verification Form and upload it to the system.
Moving forward, the designer provides the capability to specify permissions for the report through the Jmix access control mechanism. Once the report is prepared, you can execute it manually.
Moving on, you'll be connecting the report to the application's business logic.
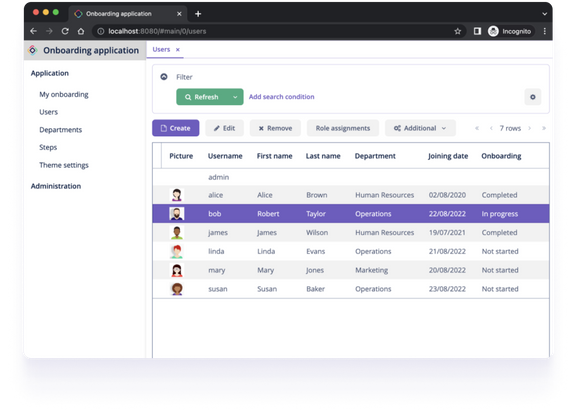
Now that the report is set up, your objective is to automatically generate the Employee Verification Form for a selected user. This includes making changes to a View that shows a list of users by adding a button to create a form for a selected user.
To proceed, open the Onboarding project in IntelliJ IDEA and locate the User.List View.
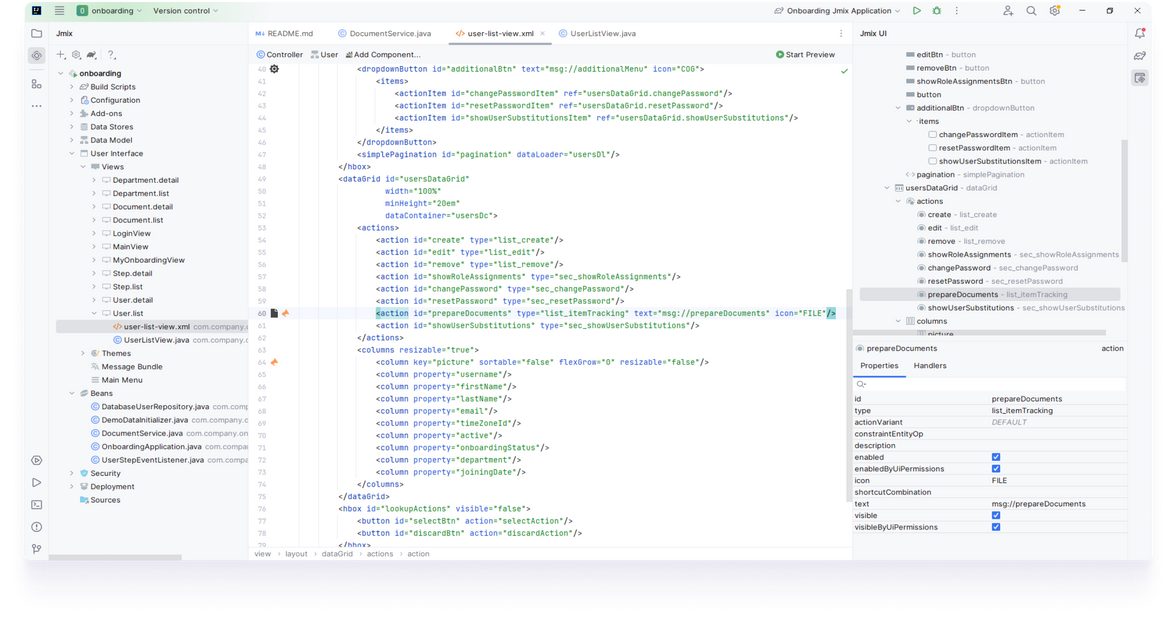
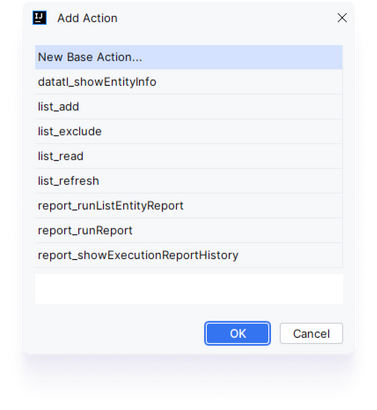
Views are defined by Java classes, usually paired with a corresponding XML file called a descriptor, detailing the view content. The descriptor is where the layout of the Users View is determined. Jmix Studio provides View Designer to develop the view layout and set UI components properties in WYSIWYG style. The View Designer assists in adding a "Prepare documents" button to the Users screen. You need to navigate to DataGrid component which displays users list and add a new action. This action will appear in the button panel and will trigger a service that you specify. View Designer help to set up layout, add components and configure it.
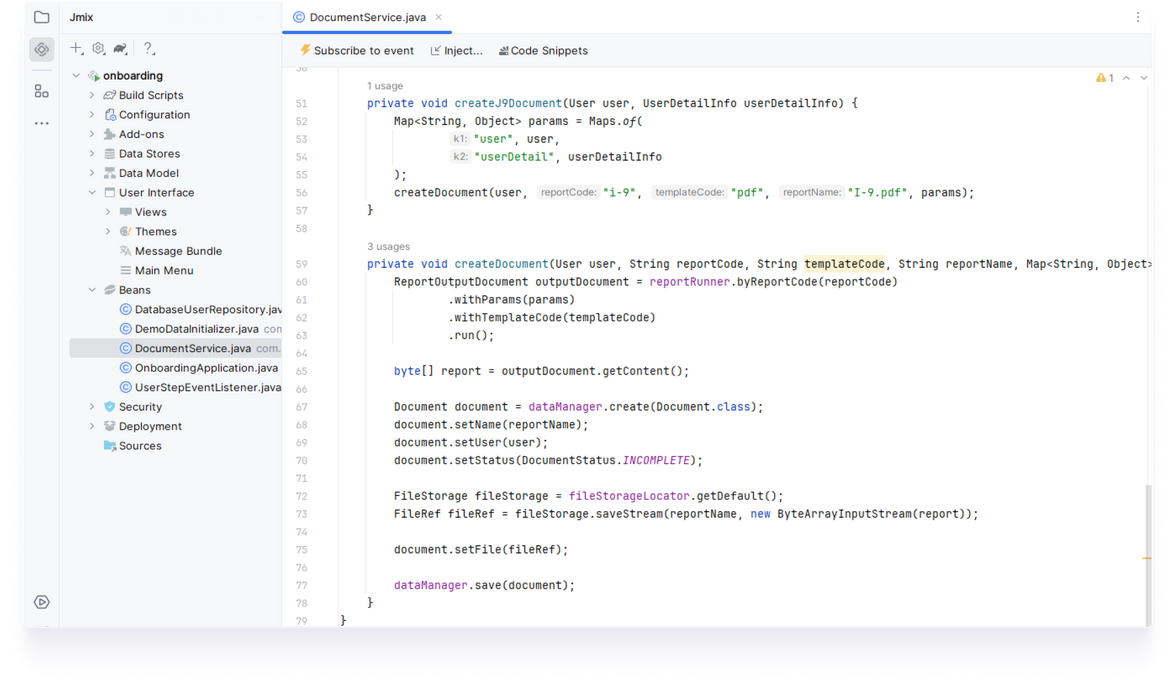
To specify the service to be triggered by our new action we need to implement a service that runs the report and saves a file in the system.
And add-on specific tools:
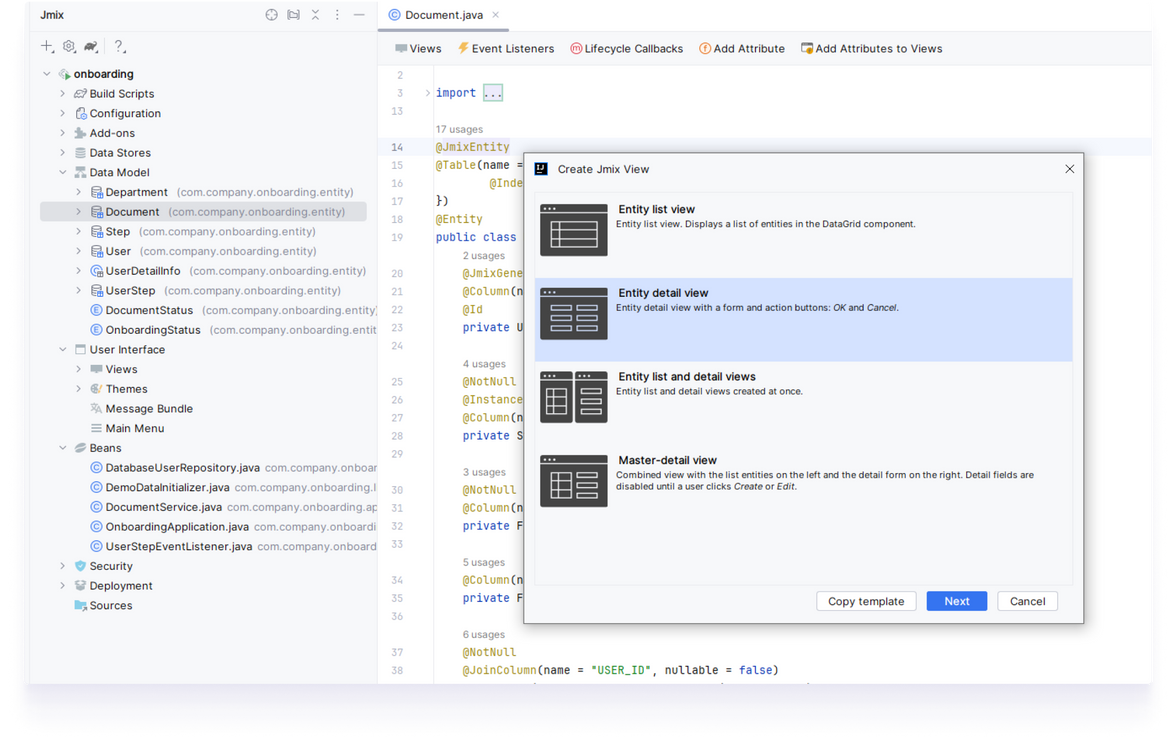
At this point, the system can generate Employee Verification From, storing the reports in the Documents entity. The Jmix View Designer helps create screens to display the list of generated reports and view Document details.
Using roles and permissions of Jmix security subsystem, you can limit access to the generated documents and display only those documents in the list that belong to the current user.
Jmix views are built from visual components that have server-side Java interface and can be declared in XML using corresponding XML elements.
You need to modify the Entity detail view and add a Vaadin component to display generated document.