


Attending conferences we always get to meet highly qualified decision makers, who frequently ask the same question: ‘How open is your framework and what if I need more than you offer out-of-the-box?‘. The question is very reasonable, as they simply don’t want to be stuck right in the middle of the development curve, then realise that the framework just doesn’t allow implementing some features or, likely, if you use open source product, it requires an unpredictably long time to dig deeper to poorly documented parts of the framework.
Significant attention is usually paid to the user interface part: how many components does the framework have? Is there an ability to integrate 3rd party widgets? Finally, how easy can those be integrated into your applications.
Even if the framework gives you an enormous number of the components out-of-the-box, occasionally you may need to have something very specific, not generally used, hence, not implemented in the framework.
In this article I will illustrate how you can integrate 3rd party visual components into the CUBA Platform.
Generic User Interface in the CUBA Platform
To give you a brief idea of what visual components you have out-of-the-box with the CUBA Platform have a look at the pictures below:
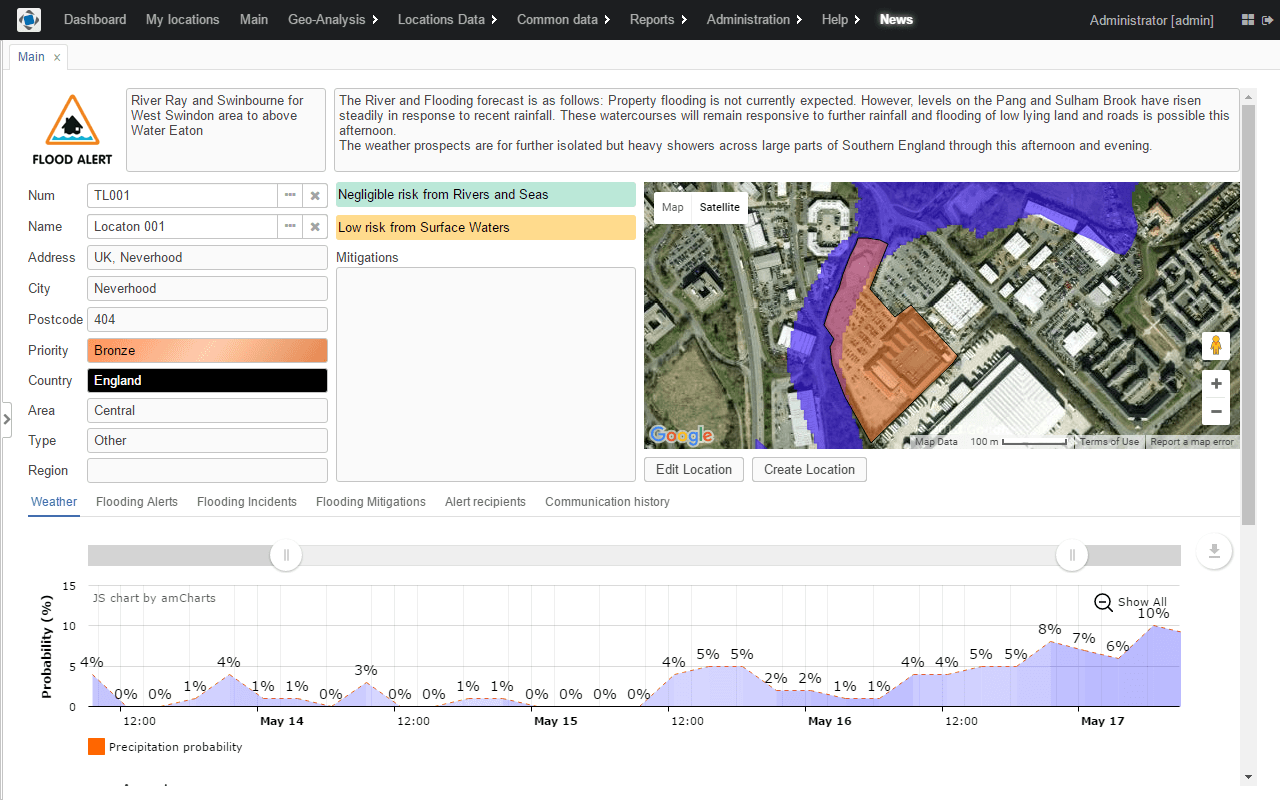
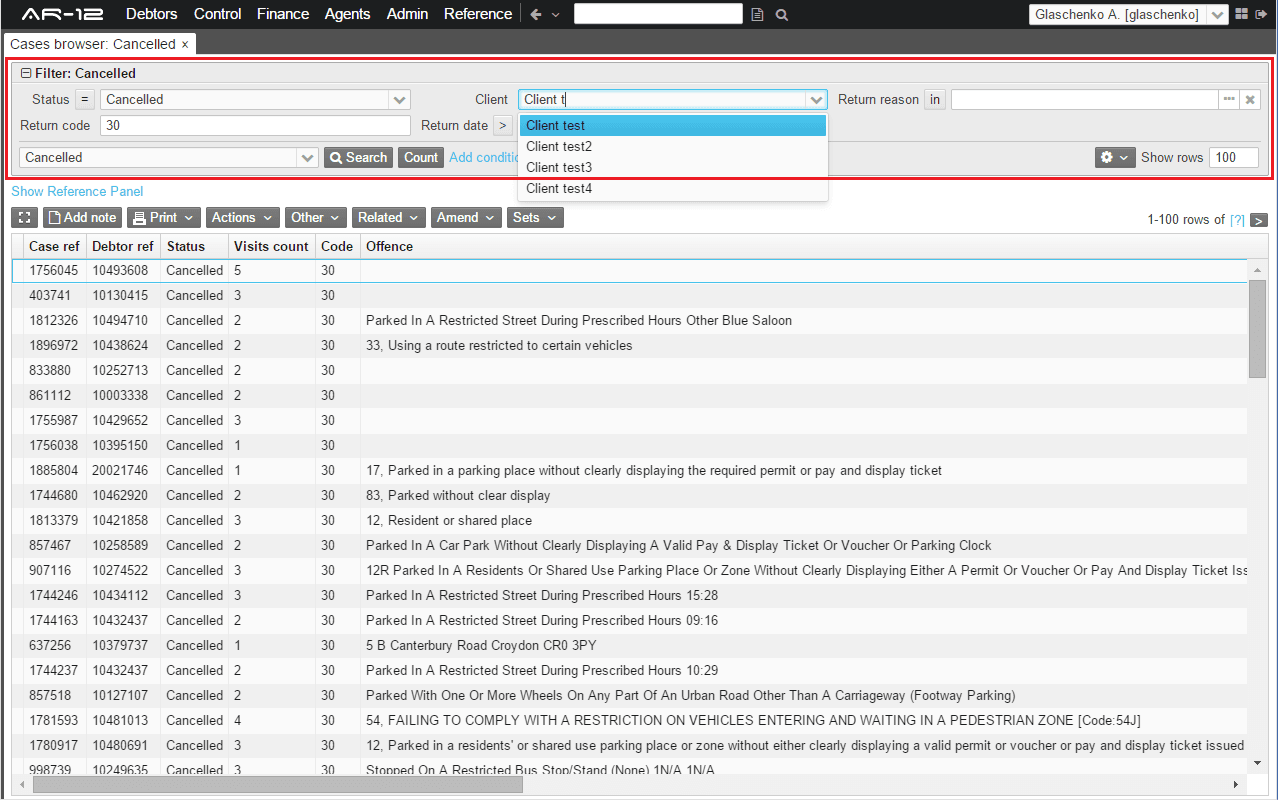
As you see, there is an extensive component set available out-of-the-box, but all of the components are very generic, widely used for enterprise applications. Let’s now assume that we need to integrate something more specific.
From version 2.1 of the CUBA Studio, this process has been massively simplified for Vaadin, JavaScript and GWT components, because the Studio scaffolds stubs and adds all required definitions for a new component. There are three levels of integration of a new component into the platform:
- As generic UI of the framework is built over Vaadin, the new component becomes available as a native Vaadin component. Developers can already use this component in CUBA applications, adding it into an unwrapped CUBA container.
- The new component is integrated into CUBA Generic UI. In this case, from an application developer perspective, it looks the same as a standard component from the visual components library. The developer can define the component in a screen XML descriptor or create it through ComponentsFactory in a controller.
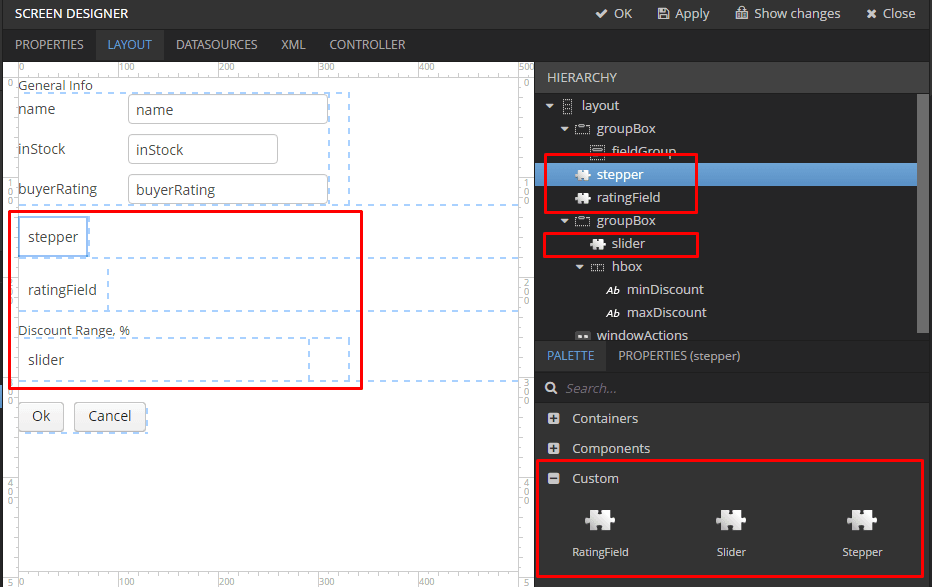
- The new component is available on the Studio components palette and can be used in the WYSIWYG layout editor, as it is shown in the picture below.
In this article we will have a look at the first level integration for Vaadin component and create a sample application to see how it can be used in your CUBA application at this stage.
Integrating Vaadin Components
As I previously mentioned, the generic UI in the CUBA Platform is built over the Vaadin framework, it is very easy to integrate its components into your CUBA application:
- Add dependency to the 3rd party Vaadin add-on artifact.
- Create the web-toolkit module in your project. This module contains a GWT widgetset file and allows you to create client-side parts of visual components. Just include the add-on widgetset to the widgetset of your project.
- If look and feel of the component does not fit the application theme, create a theme extension and define some CSS for the new component.
Let’s take the Stepper component as an example and have a look how it works in the CUBA Studio:
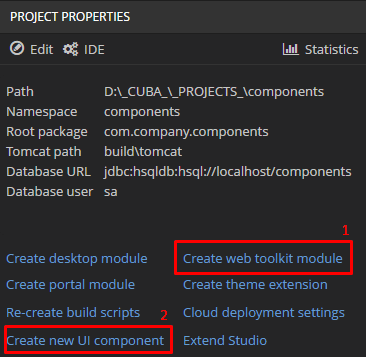
As the first step we click on Create web toolkit module, to be able to integrate Vaadin components, then we click on Create new UI component:
Now we are about 10 minutes far from having a new Vaadin component in CUBA:
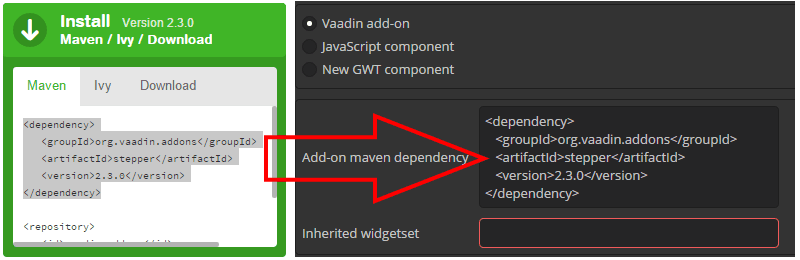
- Select Vaadin add-on in the Component type group box.
- To define Add-on Maven dependency value go to the stepper add-on page, press the Install green button, copy it from the appearing textbox and paste into the Add-on Maven dependency field in the CUBA Studio.
- The most tricky and confusing part, especially for those who are using Vaadin for the first time, is Inherited widgetset (You can learn more about Vaadin WidgetSets here, but you don’t really need to have deep understanding about it to keep going through this article). There is a Source code link in the Related links section of the stepper add-on page, click on it. The link will lead you to the GitHub repository of the component. To define a widgetset of a Vaadin component you need to find *.gwt.xml file in the sources. Continue to the addon/src/main/resources folder. Here you see the org/vaadin/risto/stepper/widgetset containing the StepperWidgetset.gwt.xml file. That’s enough to construct our Inherited widgetset value: org.vaadin.risto.stepper.widgetset.StepperWidgetset. Simply put, it’s a path to the *.gwt.xml file written as importing class in Java.
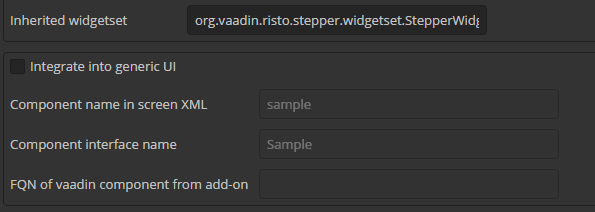
- Uncheck the Integrate into generic UI box for now and say OK.
- The Studio will show notification “Component created” and rebuild the project, because it needs to add new dependency to the gradle build script, download required library and re-compile widgetset. So, we just wait a couple of minutes until the process is finished.
- As a final touch we adjust the component to fit our application theme.
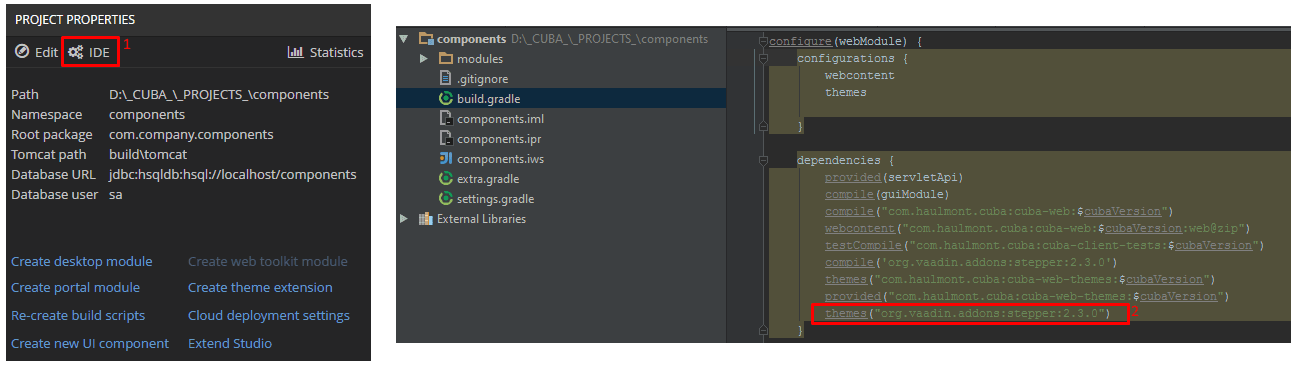
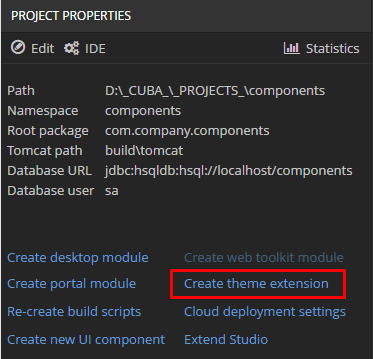
If we have a look at the source code, we can see that this component is SCSS styled, so we need to add its style to the project dependencies. To do so, go to the Project Properties section, click IDE. IDE will show build.gradle, where you should add themes("org.vaadin.addons:stepper:2.3.0") line to the dependencies clause of the configure(webModule) task, as it is shown in the picture below.
Now we can apply the styling we want. Go to the Project Properties section and click Create theme extension. Select halo, as the default one, and click Create. The Studio will add the themes/halo/halo-ext.scss file in the web module of your application, where you can specify styles for new components or modify existing ones. It will also make necessary changes in the build script and recreate project files for your IDE.
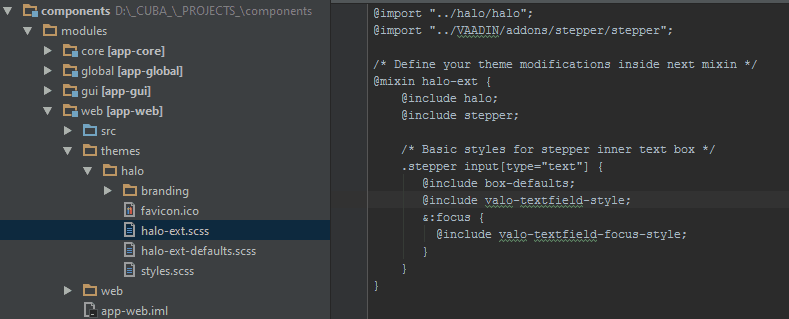
Open the halo-ext.scss file in your IDE and paste the following CSS as it is shown in the picture below:
@import "../VAADIN/addons/stepper/stepper";
@include stepper;

/* Basic styles for stepper inner textbox */
    .stepper input[type="text"] {
       @include box-defaults;
       @include valo-textfield-style;
       &:focus {
         @include valo-textfield-focus-style;
       }
    }
That’s it! Now we already can use the component in our CUBA application!
Using 3rd Party Vaadin Component in your CUBA Application
Let’s finally create a screen with the stepper. As we have completed only the first level of integration it is still not a part of generic CUBA UI, so it cannot be used directly from xml screen descriptor, but it can already be created programmatically.
Let’s get started:
-
Download the CUBA Studio from our website, install it, launch CUBA Studio server and open the studio in your browser. If you have any complications at this stage just follow the video guide (Part 1 from the Quick Start page).
-
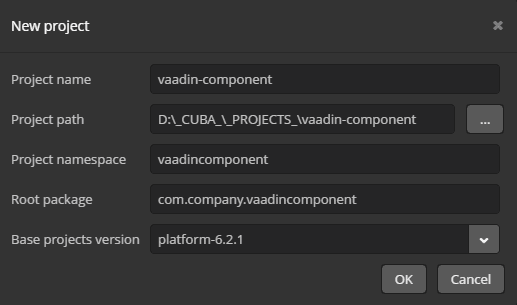
Create a project named vaadin-component. The Studio automatically names project namespace and root package.
-
Follow the steps from the Integrating Vaadin Components section.
-
Since step 3 is completed go to the Screens section in the left panel of the Studio, focus on Web Module item and click New. The Studio will prompt you to choose if you want to create a new screen from scratch or extend an existing screen (e.g. User editor or File Upload dialog). We will go for a new screen from scratch.
-
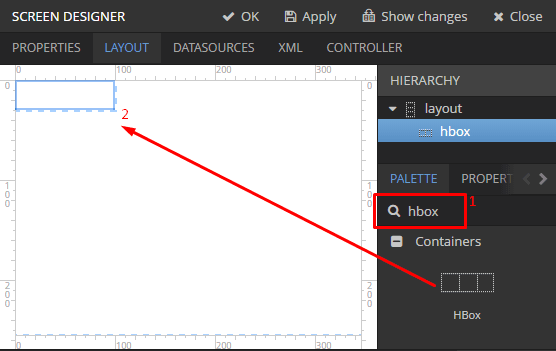
Let’s now go straight to the Layout tab, where we can visually design our screen. We need to use some container, that will act as a placeholder for the stepper. Type ‘hbox’ in the component search field, the studio will filter UI components by name. Drag and drop the HBox component to the form or the Hierarchy section.
-
Right click on the component representation, located in the visual form layout; or select component in the Hierarchy section and switch to the Properties tab (next to the Palette one).
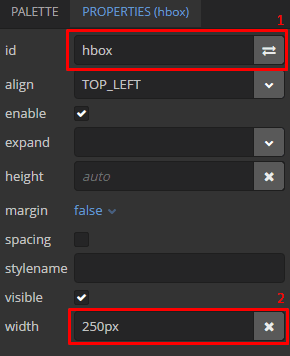
We will need to use our Hbox from the screen controller, to be able to reach a CUBA component from the controller we will need to define its id. Simply press right hand button in the id field and the Studio will generate an id automatically.
Also we would like our stepper to be 250px wide, so we specify this size to its container.
Apply all the changes we’ve done.
-
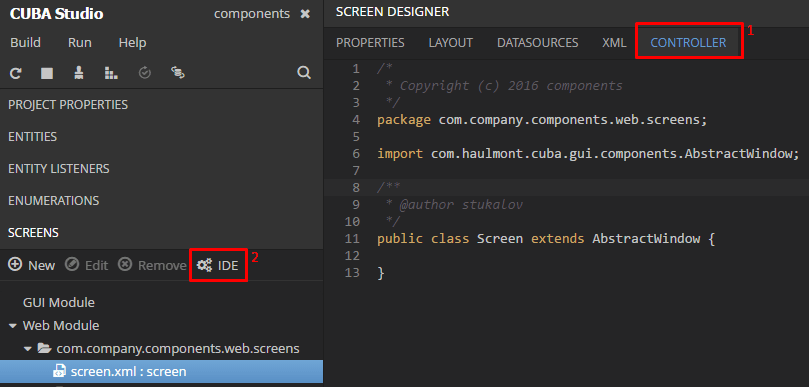
Launch your IDE, go to the Controller tab of the screen designer and press the IDE button. The Studio will generate project files and open the screen controller in your IDE.

-
Move to the IDE, where we already have our screen controller scaffolded by the Studio. Let’s code a bit. All rows you need to add are annotated with detailed comments:
package com.company.vaadincomponent.web.screens;
import com.haulmont.cuba.gui.vaadincomponent.AbstractWindow;
import com.haulmont.cuba.gui.vaadincomponent.HBoxLayout;
import com.vaadin.ui.Layout;
import org.vaadin.risto.stepper.DateStepper;
import javax.inject.Inject;
import java.util.Map;
public class Screen extends AbstractWindow {
/* Getting access to the hbox component, using CUBA mechanism for UI components injection */
@Inject
private HBoxLayout hbox;
/* Create stepper to be placed into the prepared hbox container */
private DateStepper stepper = new DateStepper();
/* Overriding init method, which will be called by the framework after creation of all components and before showing the screen */
@Override
public void init(Map<String, Object> params) {
super.init(params);
<span class="hljs-comment">/* Unwrapping hbox to get access to the native Vaadin layout to place stepper */</span>
Layout box = hbox.unwrap(Layout.class);
<span class="hljs-comment">/* Placing stepper component into the unwrapped hbox container */</span>
box.addComponent(stepper);
<span class="hljs-comment">/* Defining stepper size to fit 100% of the parent hbox component width */</span>
stepper.setWidth(<span class="hljs-string">"100%"</span>);
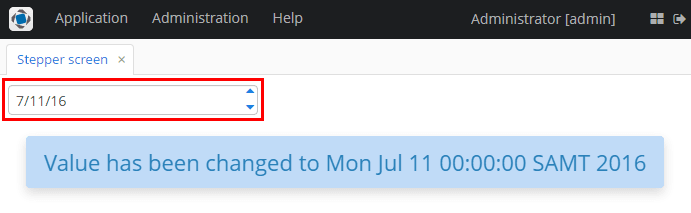
<span class="hljs-comment">/* Adding listener to show notification when stepper value is changed */</span>
stepper.addValueChangeListener(event ->
showNotification(<span class="hljs-string">"Value has been changed to "</span> + stepper.getValue(), NotificationType.<em>HUMANIZED</em>)
);
}
}
-
To access our screen from the main menu of the application, go to the Main Menu section of the right panel in the Studio, click Edit, focus on the application item and press New. We left our stepper screen id by default, so, find screen value in the drop down list and press Add.

-
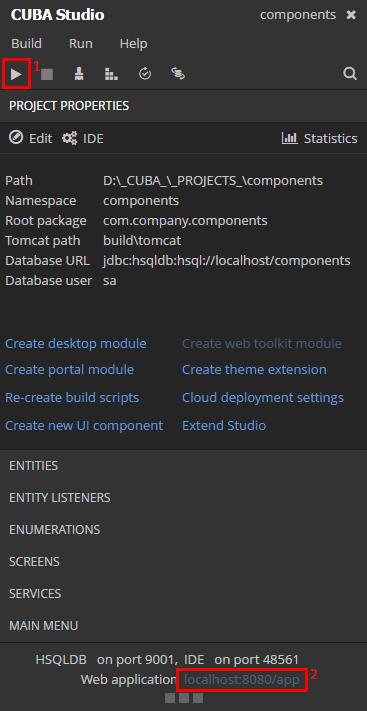
It’s time to launch the application and see how it all works. Press ‘Play’ button, which is located right under the Build item of the Studio’s main menu. The Studio will ask your permission to update DB, agree on it.
When the application is up and running you will see the localhost:8080/app link in the bottom-left, click on it.
The CUBA Application will meet you with the login screen, where default user is admin, guess what is the password? Just press Submit. Click on the Application -> Screen item of the main menu and here we go!
You can find the source code of the working stepper sample project here.
Conclusion
Also, I would like to admit that some parts of the process can be hugely simplified and even totally eliminated, but this is the first step that can immediately help users to saturate our generic user interface with rarely used, but sometimes extremely useful widgets. So, if you have suggestions or ideas on how it can be improved, please share them with us on our forum.